I’ve seen a lot of RV bloggers that use magnetic knife racks for their blades and they look really nice! However, with our preschooler and our pets (two dogs and a soon-to-be cat), I’m not comfortable with free floating blades. This is especially true going down the road, since mostly everyone rides back there.
Now, this creates a secondary problem though, because it’s inevitable that stuff in your RV drawers slides around to some degree. My mom’s solution to the problem would have been to put every sharp object in a Tupperware container for travel and this isn’t a horrible idea. The downside of that plan is that it’s going to take up more precious storage space in your drawers.
The best solution that I’ve found for regular knives is this stacking knife organizer.

This also comes in a silverware organizer version, which I fully intend to buy once I have actual silverware in our RV (which isn’t yet).
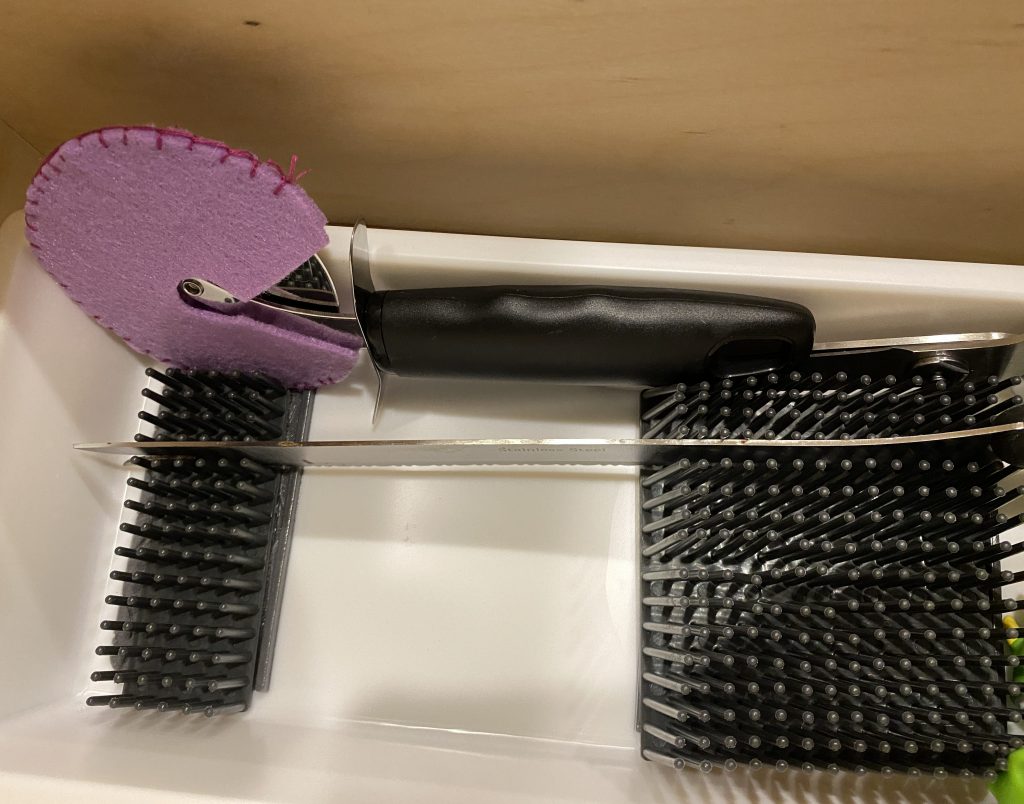
If we ever start carrying steak knives, that’s the model I plan to buy, but we only carry 4 sharps for the kitchen in our RV currently: A pizza cutter, kitchen scissors, a chopper, and a bread knife. So I bought this little stand up thingy from Walmart to keep them from getting tossed around:
It’s basically a couple of spiky strips that sit in a tray, which is included. It’s called the “Mainstays Plastic Non Skid Drawer Organizer” and I paid $7.98 for it.
You can tuck like wooden spoons and stuff into it as well, but I mainly needed it for the knives. Over the top I lay our flat vegetable grater and so far everything is staying nice and snug.
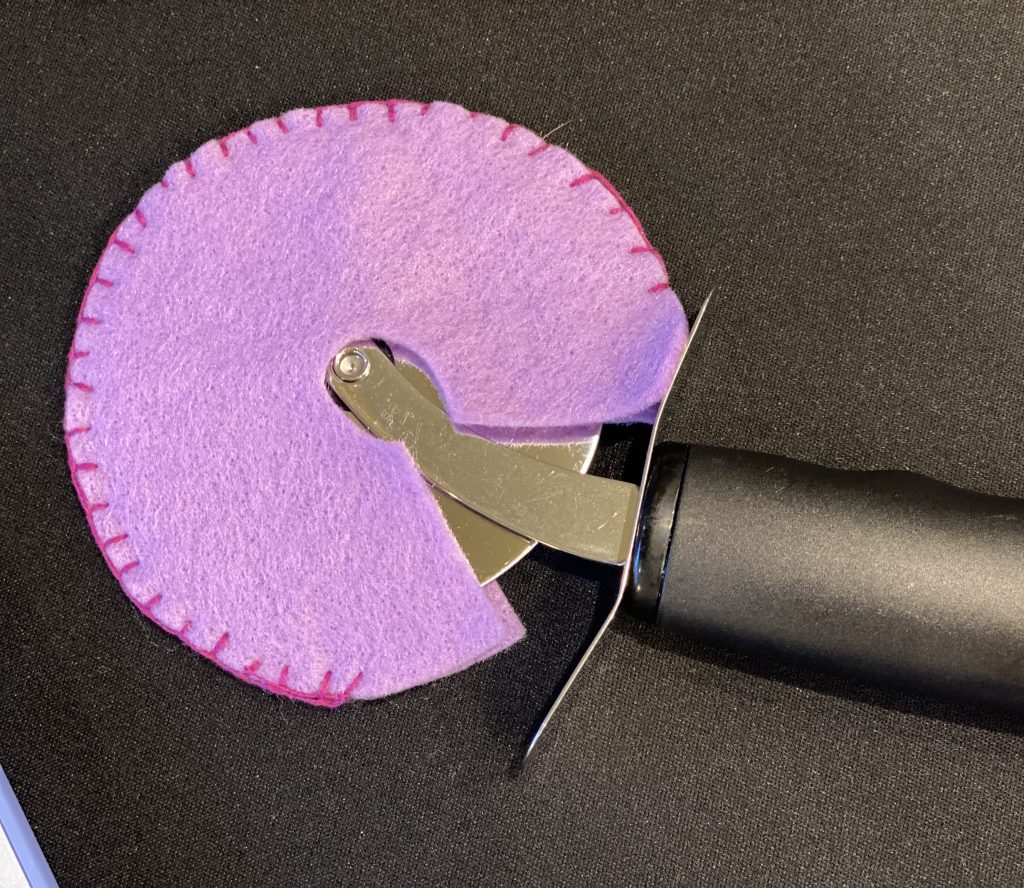
This did not solve my issue with our very sharp pizza cutter, however. My old pizza cutter was thick and not so sharp, but this new one is like a razor blade. So, I decided to make it a hat, so it wouldn’t slice anyone that reached into the drawer.
It’s really simple. All you need is craft felt, thread and needle, and scissors. I like to just keep an embroidery thread assortment on hand. It’s cheap, versatile, doesn’t take up the space of traditional thread, and I get a lot of color choices. I don’t bring all of the colors with me in the RV, just a few in a little baggy with some needles. The thread can be varied in thickness depending on how many strands you use, so I find it handy for all sorts of stuff. In this case, sewing.
Step 1:
Wash the felt. I just washed it by hand with dish soap and then hung it over my stove handle to dry. It only took a few hours to dry, but I gave it 24 hours anyway.
Step 2:
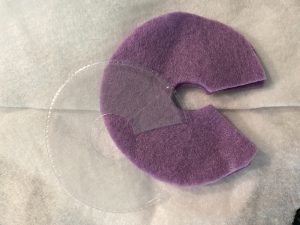
Cut the felt to the size that you need. I had a piece of the packaging left that I had initially intended to use as a cover, but it was just too flimsy.

If you don’t have any packaging, then just trace the pizza cutter and use the paper as a pattern for the fabric. You’ll want to leave a lip about 1/8″ – 1/4″ bigger than the blade itself. It’s easier to do that on the paper when you cut out the tracing than it is to cut the fabric bigger.
I was going to just post a free pattern for it, but pizza cutters vary a bit in size.
Step 3:
Pin the edges of your “pizza cutter hat” where you think you’re going to be stitching. Then try it on the pizza cutter for fit. Keep in mind that the pinned edges will be tighter fit than the stitched ones will and you don’t want your hat to be too sloppy or it won’t stay on.
Step 4:
Use three strands of your choice of color of embroidery thread and thread your needle. Let’s start!
We’re going to be doing a blanket stitch. I have pictures how, but there is an excellent tutorial here at “Holiday Crafts and Creations” if my instructions don’t make sense.
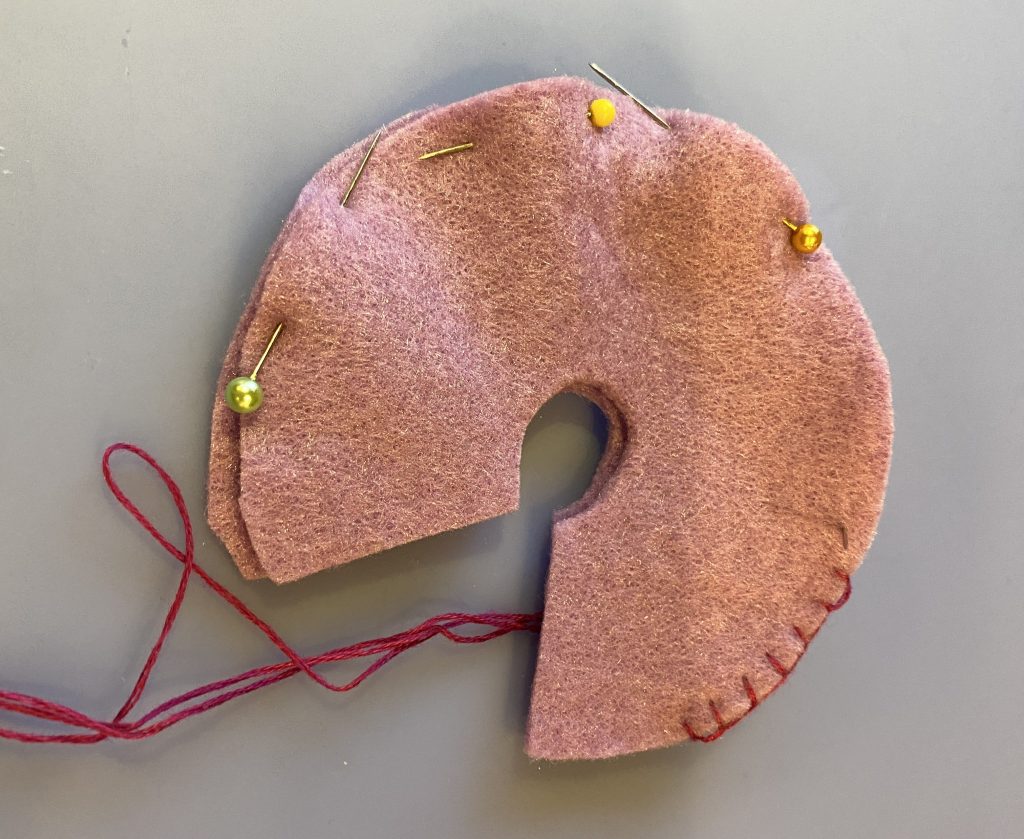
When you tie on, you’re going to want to leave a little extra edge space that isn’t stitched closed, so that you can push the blade in. Here, I’ve left about 1/2 inch. I found it out through trying the hat on and repinning until I was satisfied with the snugness of it.
After tying on, push the needle through the fabric:
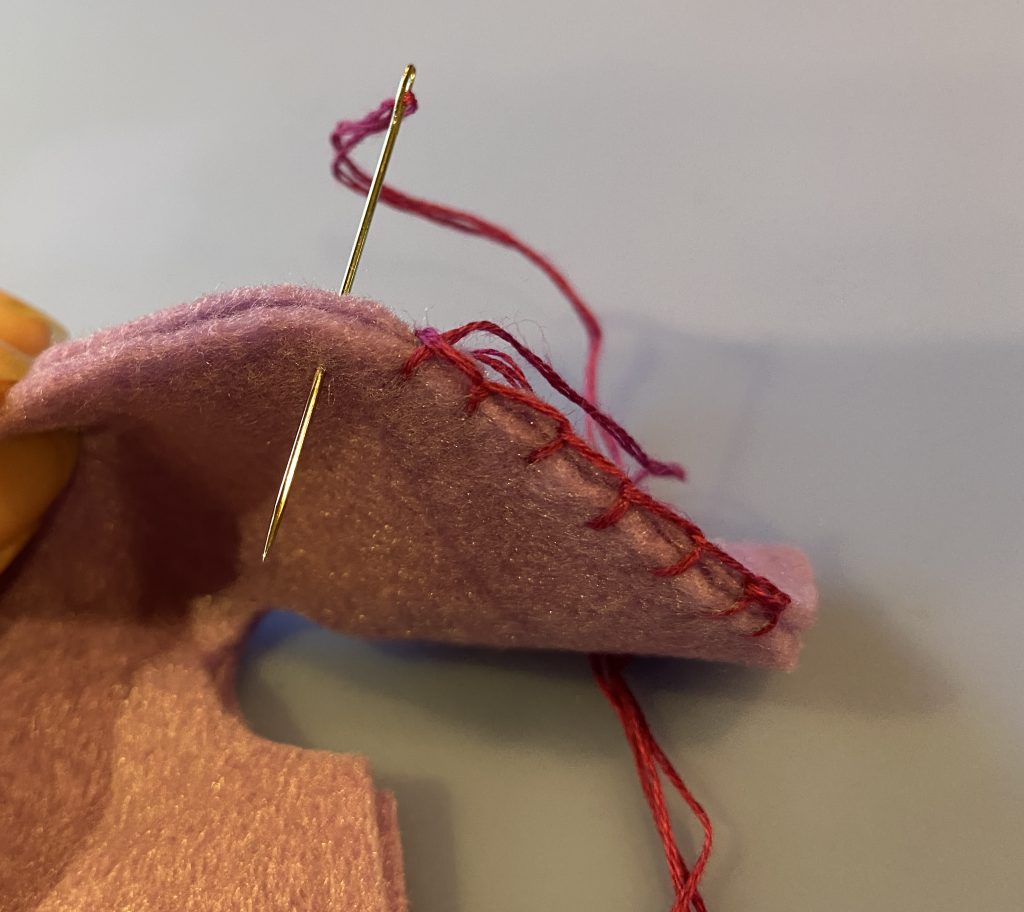
Then, don’t pull the thread tight! We’re going to loop back under that stitch like so:
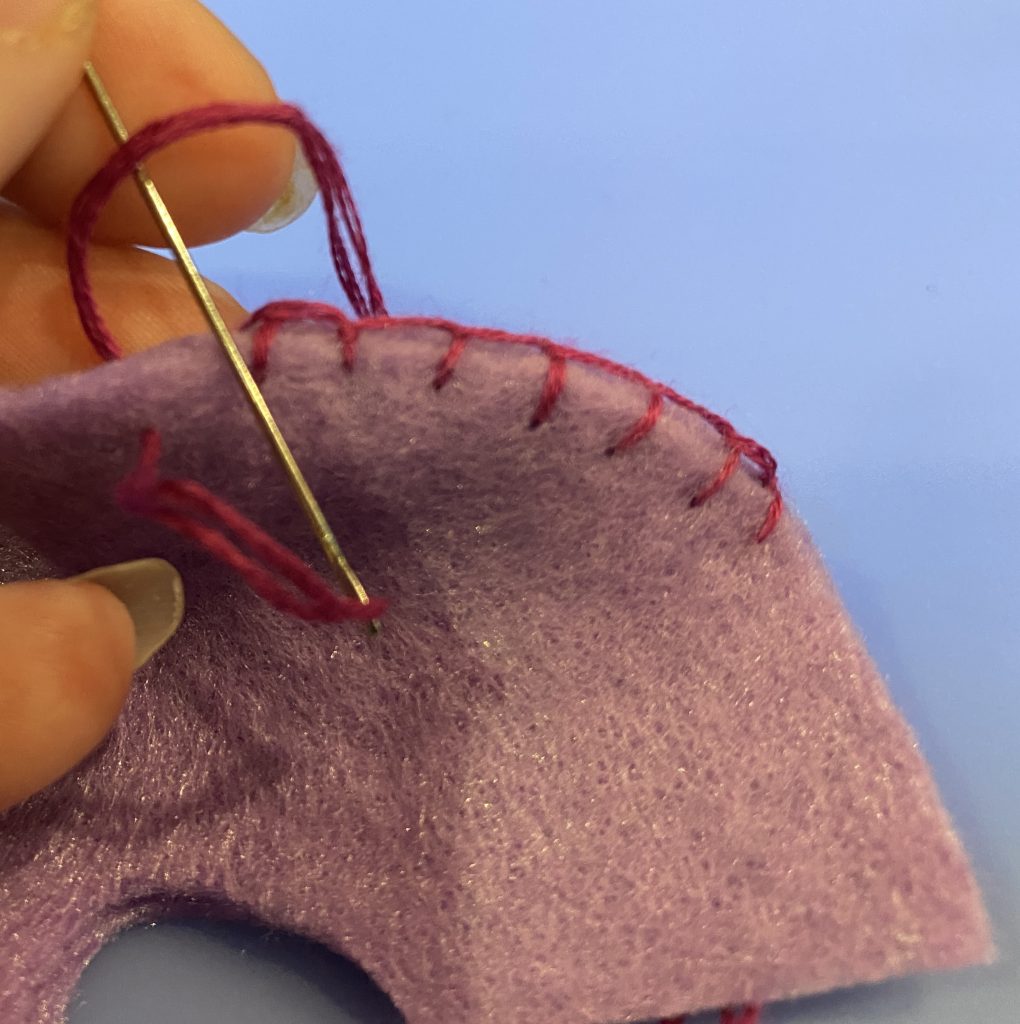
Now pull it tight. It should make a little pattern of lines around the edge.
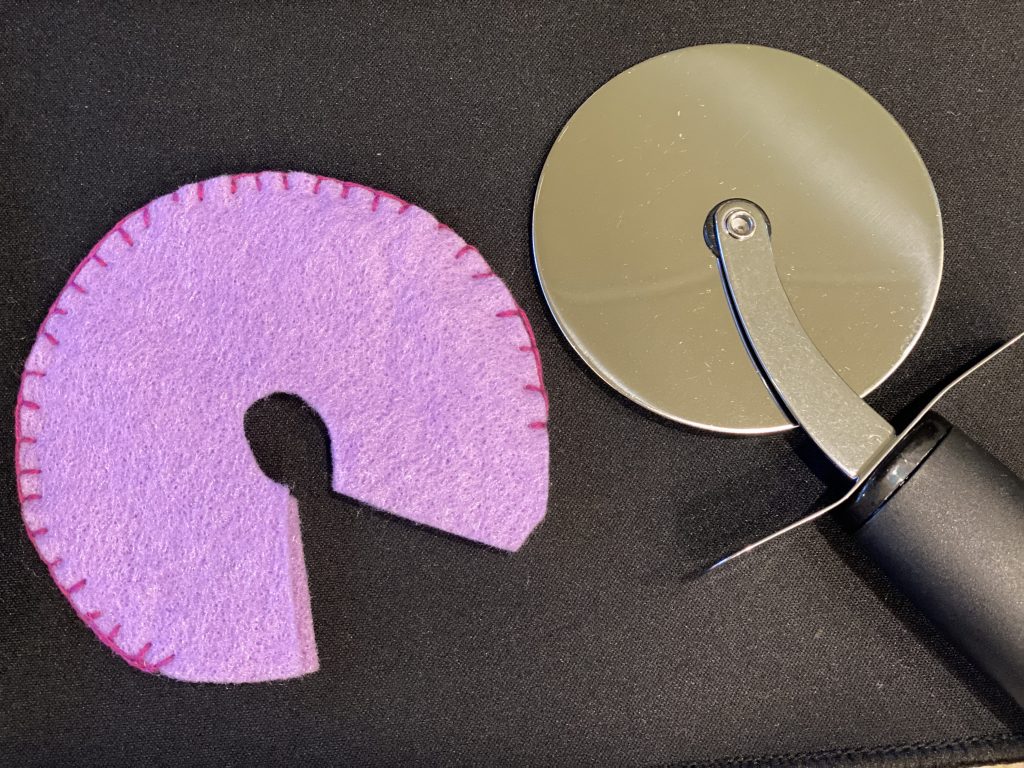
That’s it! Done in under 15 minutes.