These also work well as New Year’s Eve Candles, by the way, if you just change the wording a little. This little activity is something that I plan to do every year for the holidays.
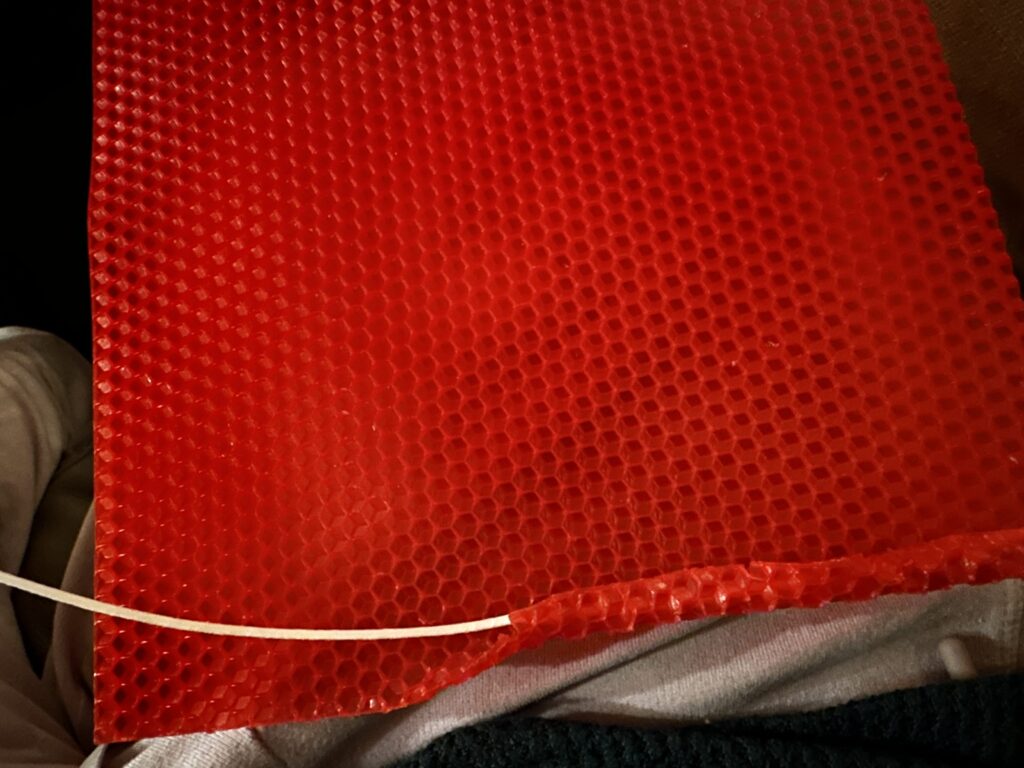
This year we made our own advent candles from beeswax, rather than buying them from the store. It was an idea born from necessity. I had forgotten to order and no one could get advent candles shipped to us in time for the start of Advent. The candles were not traditional colors, because the kit didn’t have enough of just purple and pink, but our hearts were in them.

The idea worked out fantastically. We loved doing it. Making the candles made the event feel more special, personal…. even more reverent because we were able to add the work of our hands to our worship.
Rolling beeswax candles isn’t difficult – even the smallest of children can do it with a little help, as can hands that are weakened. The project is incredibly therapeutic. There is a faint, but cozy scent, and the texture of the malleable wax as you roll it is very pleasant. This is the Beeswax Candle Kit that we used.
We had some leftover sheets and I like to make presents to give to others for holidays with Bug. Plus it was fun! It just made sense to send some to our loved ones.
I had this idea forming in my head of how I wanted to present the candle. I wanted it to be
-
-
-
- sort of ceremonial
- provoking of the reflecting of the good things of Christmas – its representation of hope, its message of salvation coming to Earth
- the happy memories and joy of years past with loved ones
- the treasuring of the current season
- hope for the coming year and
- a feeling of love to the recipient.
-
-
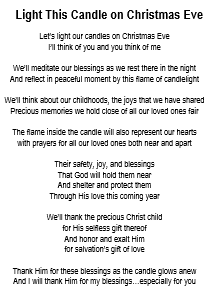
I thought that (surely) someone had already created someone had already created such a tag to give with a candle. After a couple of days of searching on and off, all I could find were bland “here’s a candle to light for good luck” messages. Which – that’s fine. It just wasn’t what I was looking for.
So I just wrote my own. I hope that it inspires you to start a tradition with family and friends. Spread the light!
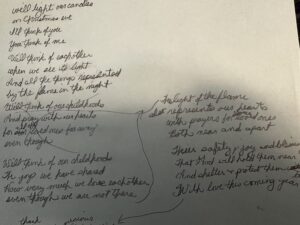
As you can see it went through a few iterations before I felt I had it right. This was my final draft.
To wrap your candle, you start with a flat sheet and a wick string. Pinch the wax over your wick, then just slowly roll it up, making sure it doesn’t kick off to one side and that you keep a nice, even edge. If you want to add a scent, rub a bit of essential oil on the sheet before you wrap it up. I mean, you can do it after, but it lasts better if you put it inside.
There are fancier candles too (there’s instructions in the beeswax candle kit) where you can cut the sheet diagonally to get a spiral candle. If you want to you can also cut the sheet in half to make two shorter candles or into thirds to make votives.
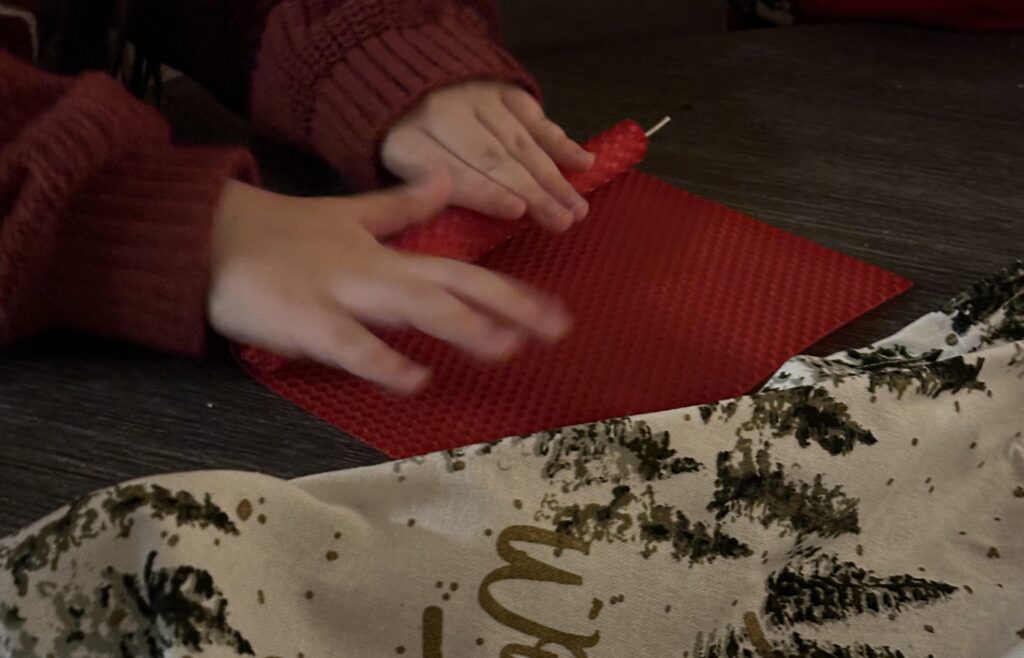
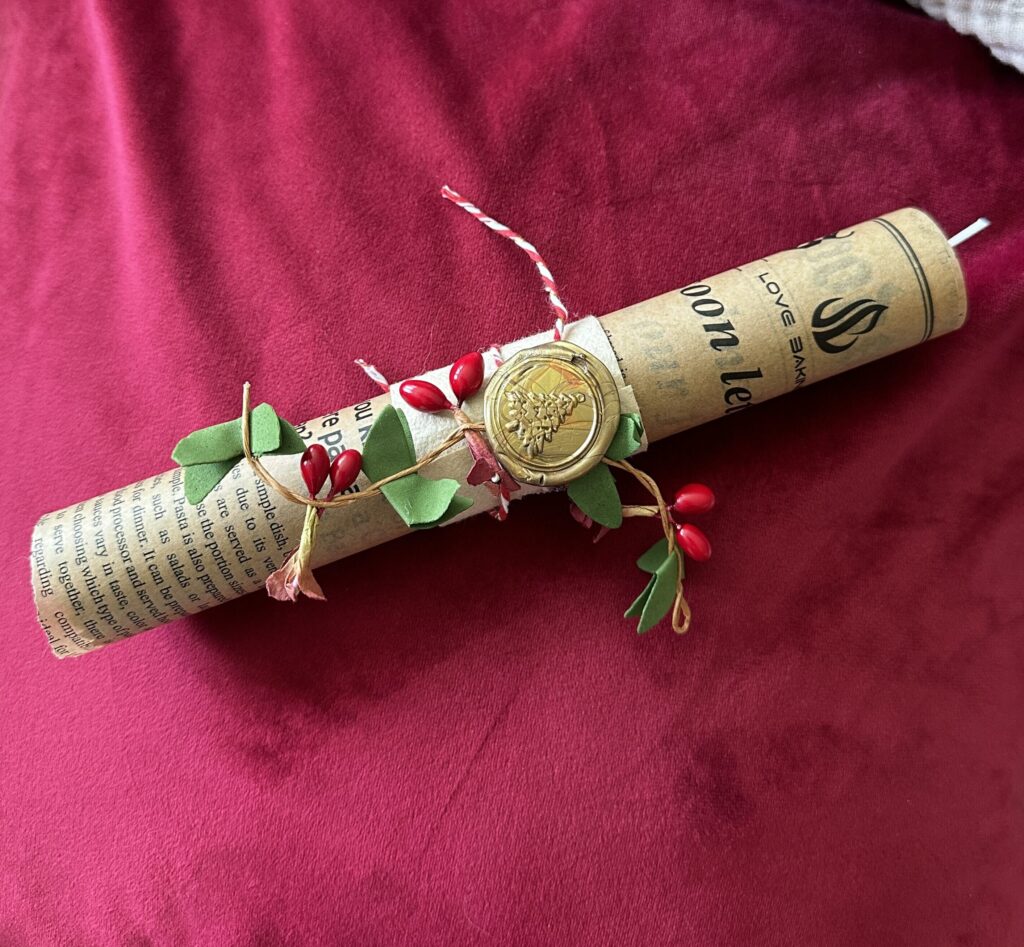
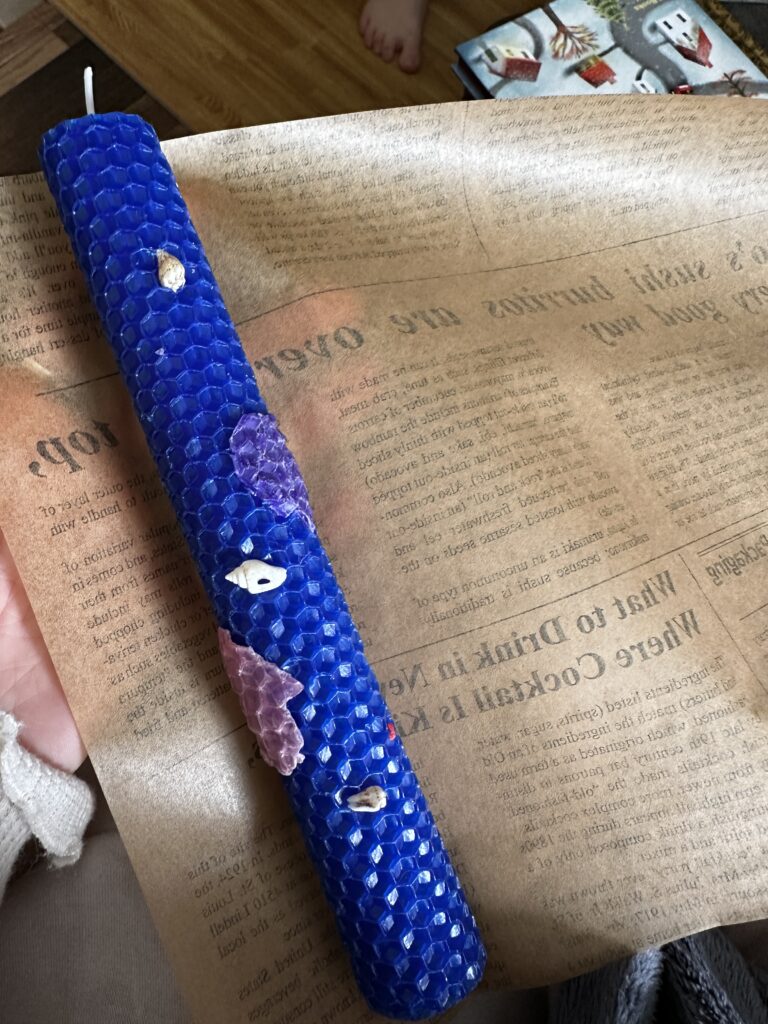
To decorate our candles, we used Wilton miniature cookie cutters to cut shapes from extra wax and attach them to the candles. The wax easily adheres to itself.
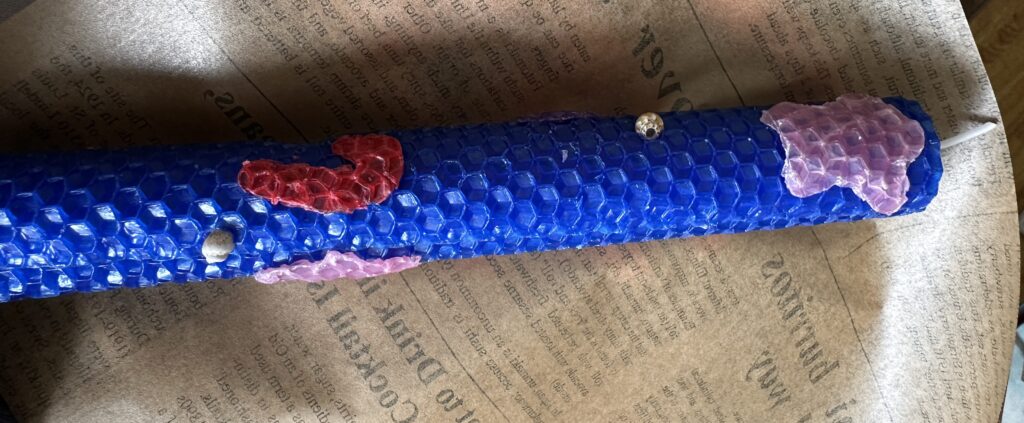
We also used tiny assorted miniature shells on some of them, because my sister’s decor is beachy. Since making the candles, I’ve found the ones I’ve linked because they are whole shells. The ones you see pictured I took from a string of shells that I had in my studio, so there is a hole in each shell for the string. The new ones I found look better and have good variety. Other ideas might be little jewels or gemstones – something that won’t melt against the flame of the candle.
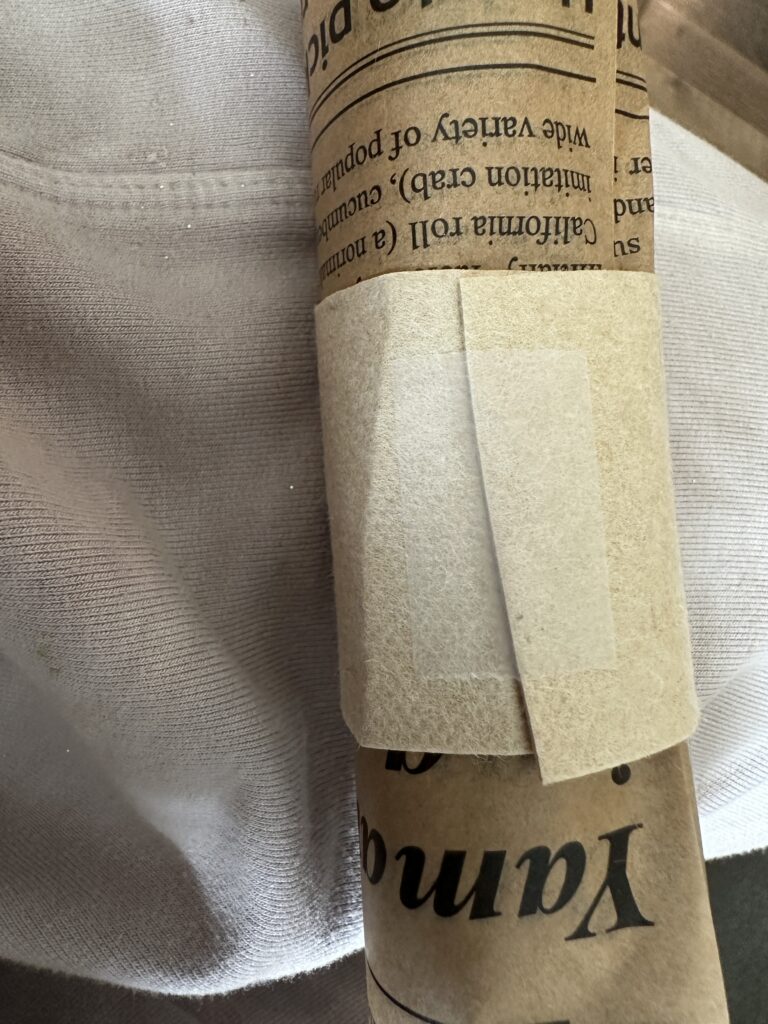
One of the great parts of making candles this way is that there is no dry and set time. They are ready to go. We then wrapped the candles in newspaper parchment paper which works great because it doesn’t stick to the candles. It was also the perfect width to go from end to end of the candle.We secured that with tape, then used a strip of textured paper from this set. One sheet of paper will make about 12 wraps. Secure with tape.

On some of the candles, I also then used colored twine for the next step and tied a sprig of artificial greenery to the candle over the taped area. Then, I just started using a glue dot to hold it in place instead. This is what they looked like with the twine. I think it would have looked good with either just the twine or just the greenery, but the greenery overpowered the twine to where you didn’t notice it.
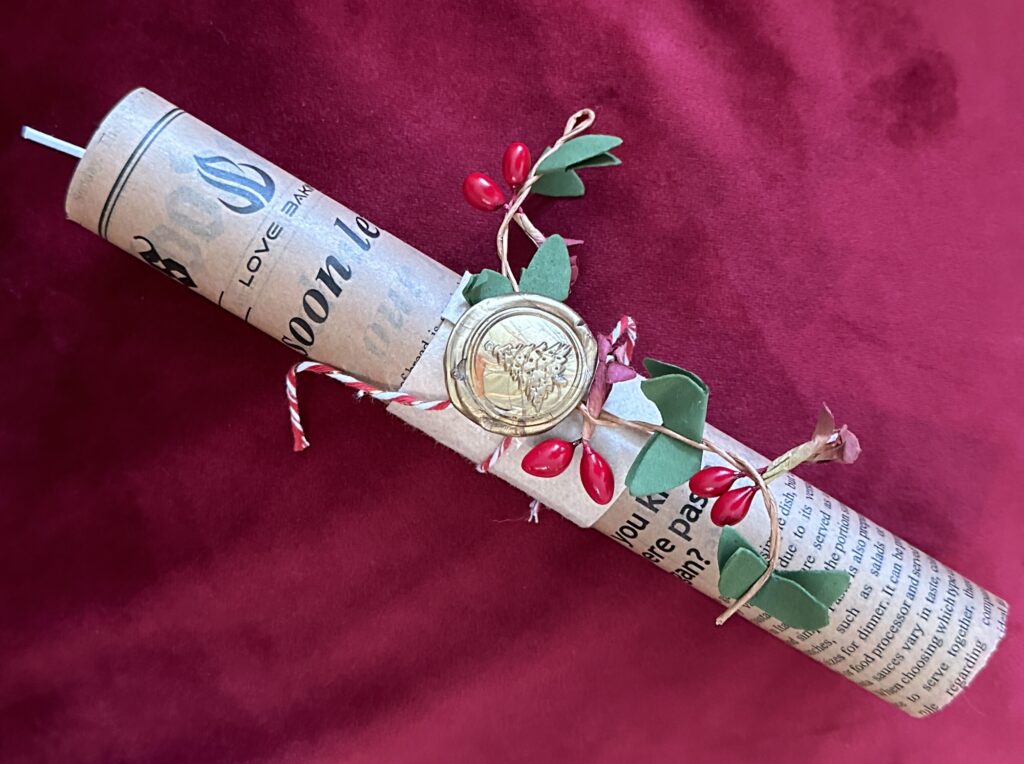
The greenery I bought at Hobby Lobby and the stems were bendy. It was in a bunch that I cut apart with jewelry snips.
Finally, I topped the bundle with a sealing wax stamp. I used this Christmas tree sealing wax stamp. Because the candle was cylindric, I made the stamps ahead of time. I used metallic hot glue sealing wax to make it a little easier.I made the stamps on this sealing wax tray rather than on the candle so they would keep their form better.
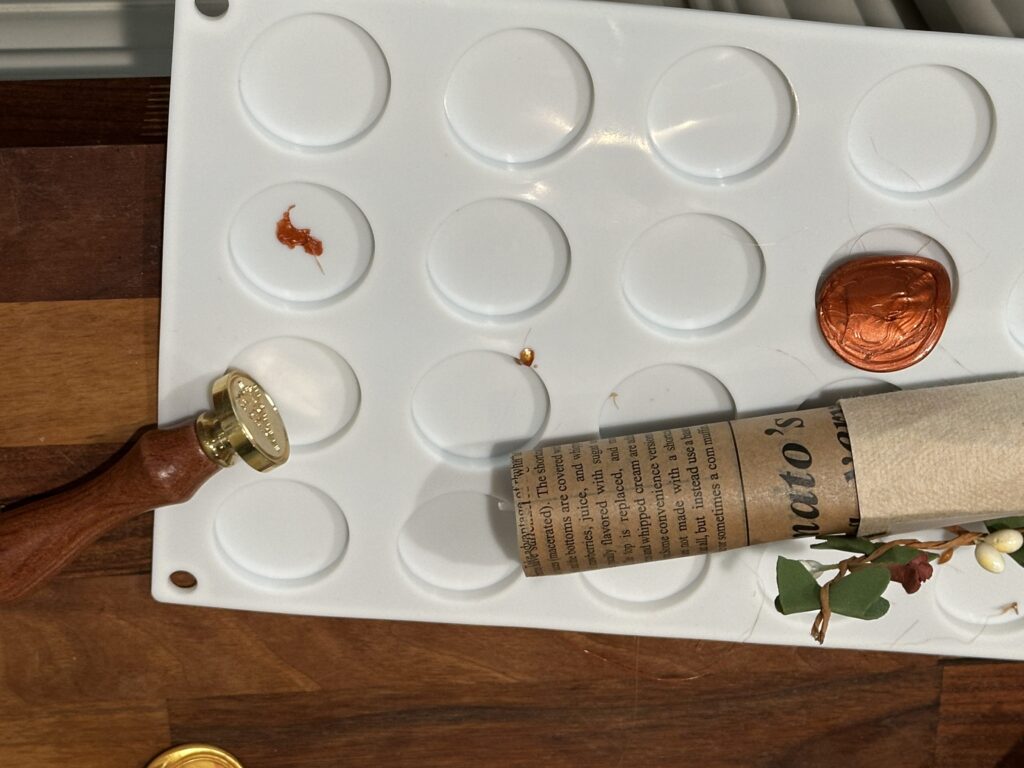
The tray also came with adhesive stickers, so I was able to just stick the completed stamp to the candle when ready. I waited until the wax was nearly cooled, then bent it slightly around a small bottle that was about the same diameter as the candle so that it would adhere properly.
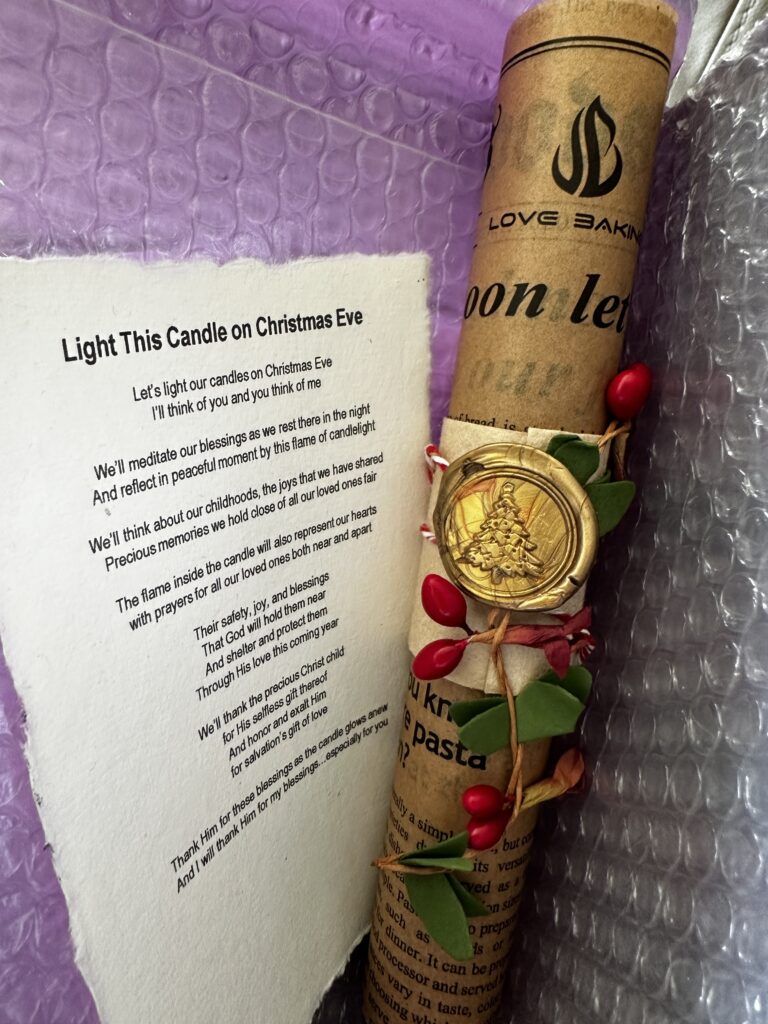
I printed the poem on this watercolor paper and then tore the sheet for the edge.
Each candle was sent out in a box with other gifts. To package them, I took a purple bubble wrap mailer and split it down just one side, leaving the bottom and side intact. I nestled the candle and poem inside to keep them from getting beat up from travel.
As I make more in future years, I’ll add more pictures. I think next year I won’t wrap the whole candle in the parchment, but rather just the middle third. We’ll see 🙂 !
In the meantime, I hope you enjoy the project and give it a try. If you want the poem preprinted on a pdf with pretty decor, visit my Etsy store I have some for sale in there.